Learn how to create Shopify customer segments for your membership tiers using Single. This integration allows you to easily connect your Member list with marketing automation platforms like Klaviyo or Mailchimp.
How it works
When you publish a Membership using Single:
- We create customer tags for each Membership tier.
- These tags are automatically added to customer profiles in Shopify.
- Each tag consists of the Membership title appended by the tier name.
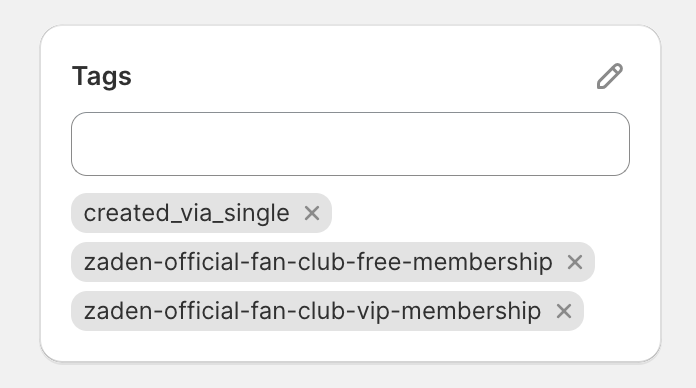
For example, if your Membership is called "Zaden Official Fan Club" with "Free Membership" and "VIP membership" tiers, the tags would look like:
zaden-official-fan-club-free-membershipzaden-official-fan-club-vip-membership
If someone cancels their membership, we remove this tag to ensure you always have an up-to-date list of your members.
Here’s what that looks like in action:
Watch a video
Step by step
- Go to your Shopify Admin
- Click Customers > Segments
- Click Create segment
- In the segment creation module, click Apply a filter
- In the list of Shopify filters, choose Customer tags
- From the action list that appears, choose Contains this exact tag
- Choose the tag matching your Membership tier
- Click Apply filter
- Save and name your segment
What's next
- Use your new segment for targeted marketing
- Create segments for other Membership tiers
-
Integrate with a marketing automation platform (Klaviyo, Mailchimp, etc.)
Recommended marketing platforms
When you're picking a marketing platform, keep an eye out for these helpful features to make sure it works seamlessly with your Single memberships:
- Shopify integration with ability to import customer tags
- Basic automation capabilities (e.g., welcome emails for new members)
- Segmentation tools for targeted messaging