A Step-by-Step Guide to Giving Members Early Access to Products on Shopify
Step 1: Create an Early Access Product
To offer early access to products for members, start by creating a new product in your Shopify admin and marking it as early access. Follow these steps:
- Log in to your Shopify admin.
- Go to the "Products" section.
- Click "Add product" to create a new product.
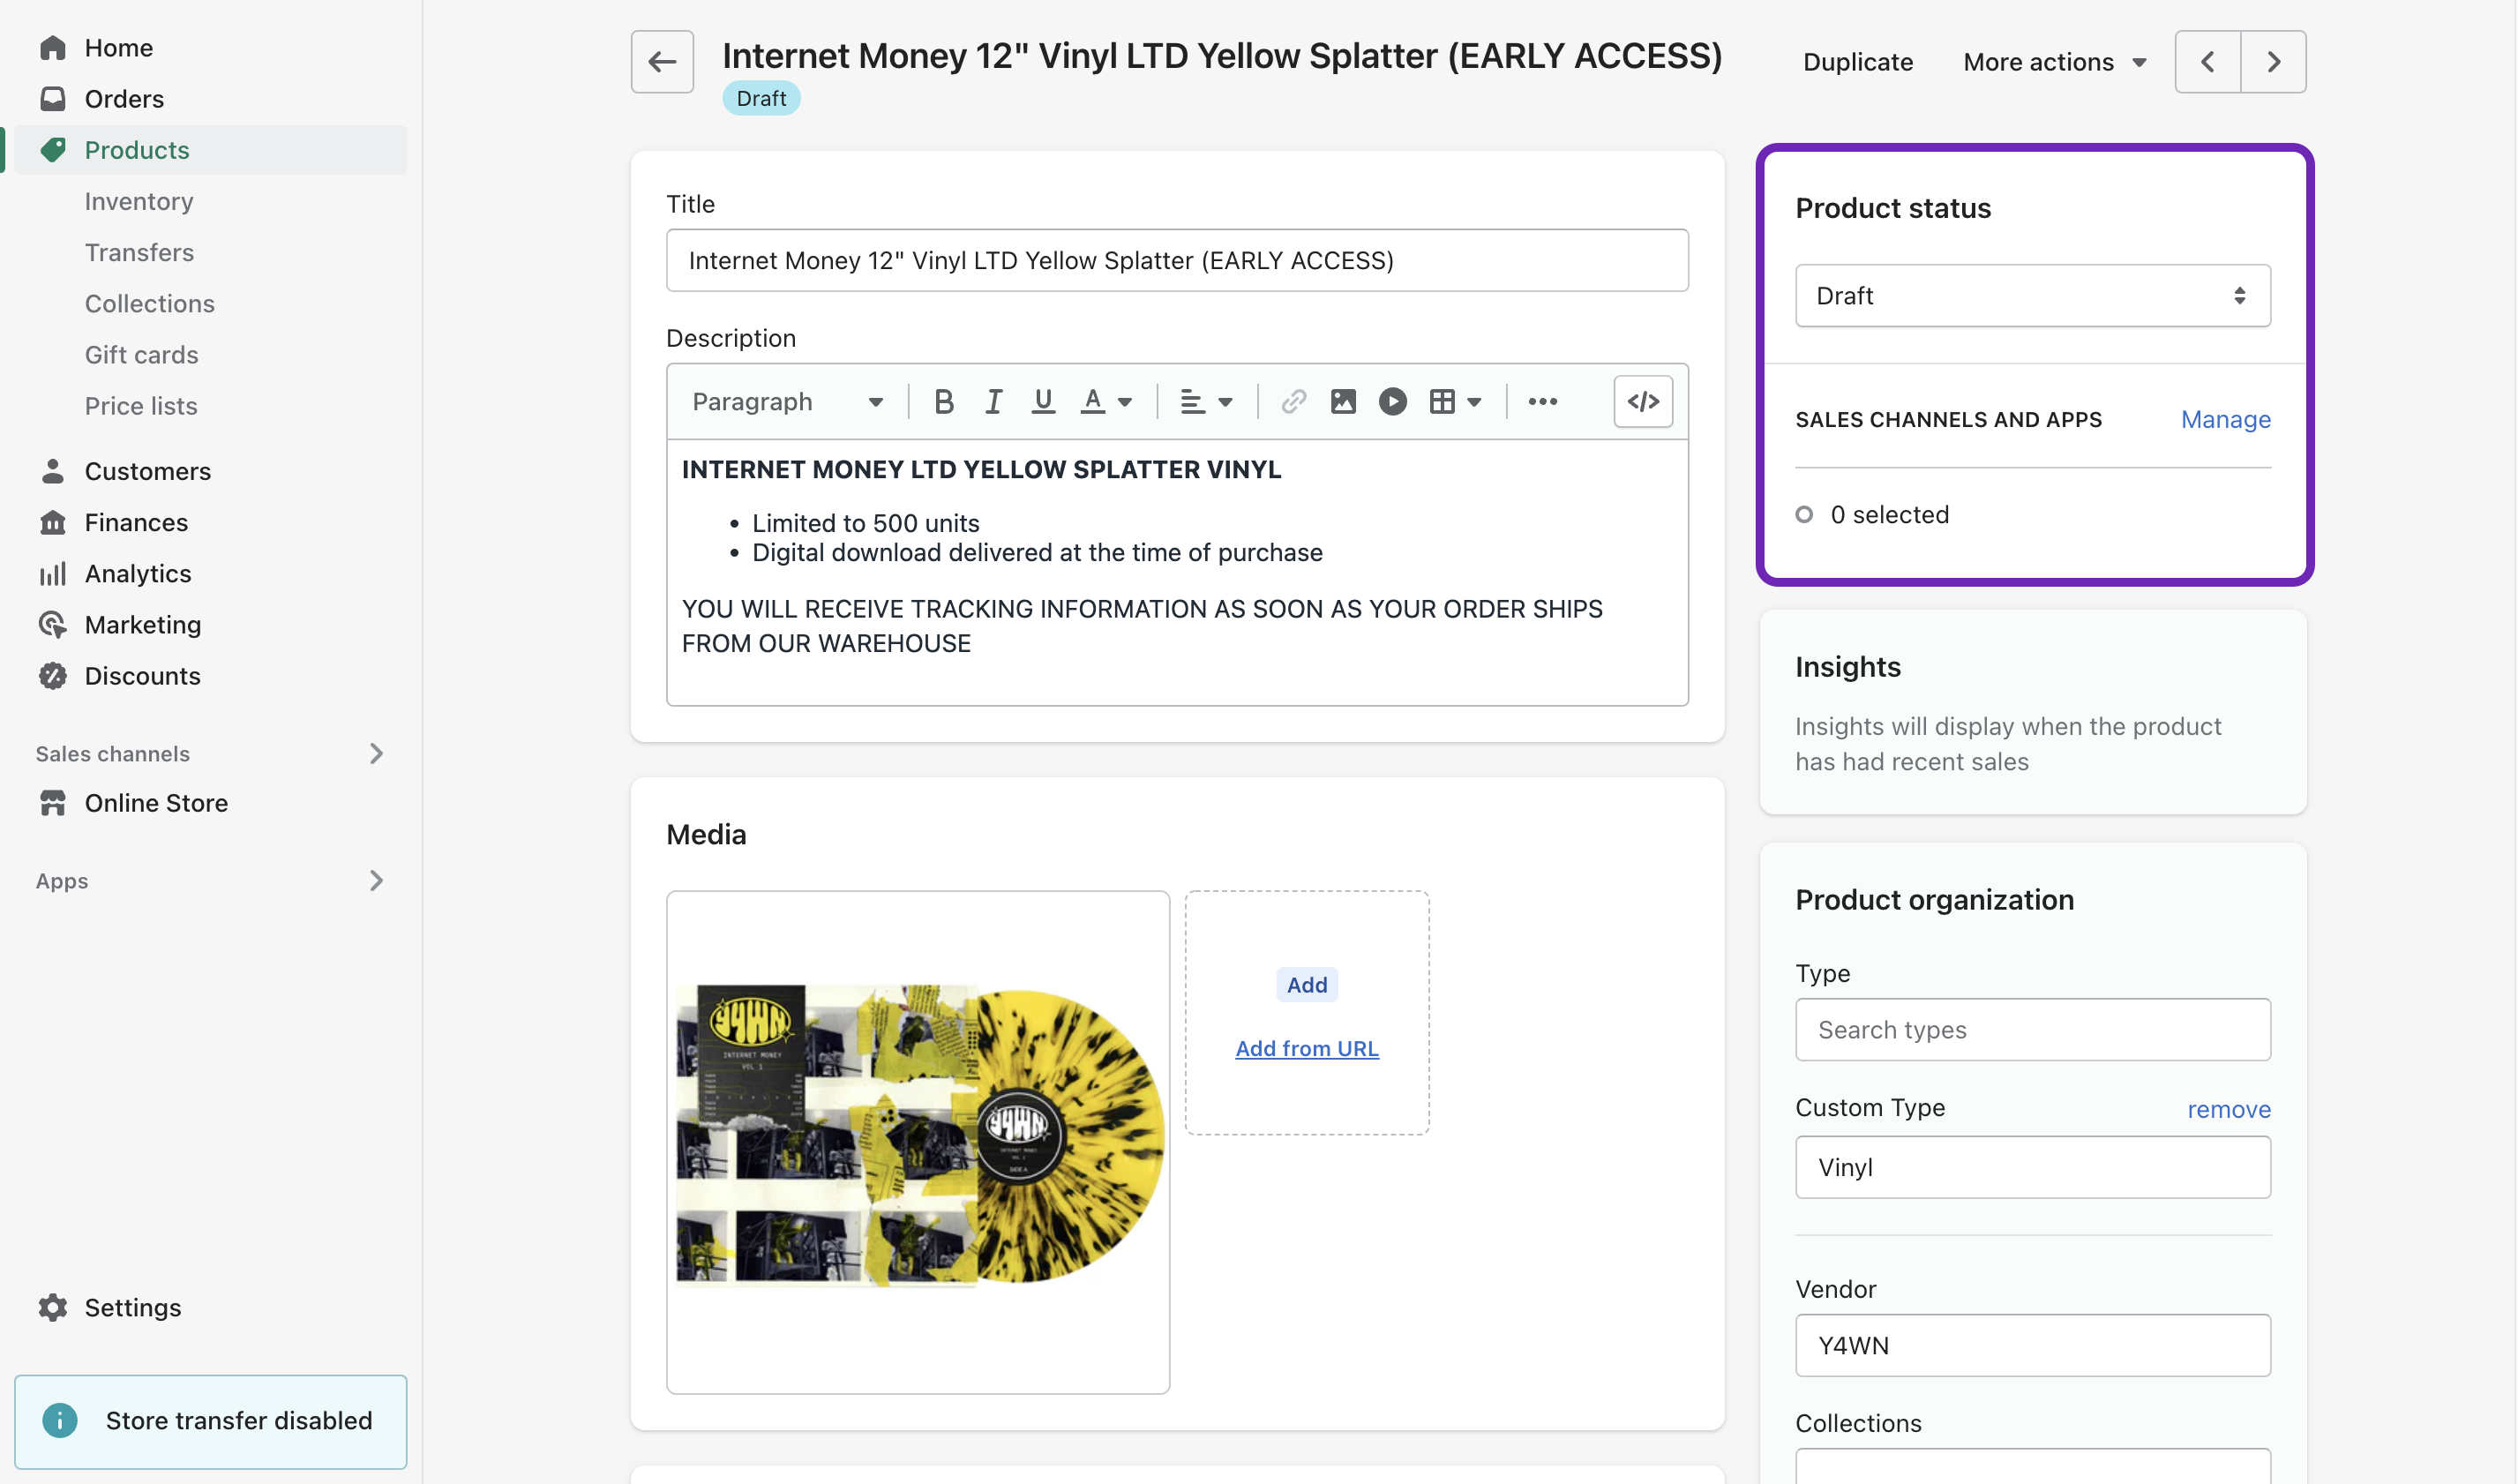
- Enter a product title with "(EARLY ACCESS)" in the title.
- Set the product status to "Draft" to hide it from active sales channels and apps, keeping it from non-members during the early access period.
Heads up: Once the early access period is over, you'll go back to your Shopify admin to remove "(EARLY ACCESS)" from the product title.
Step 2: Convert the Early Access Product into a Tier Perk
Now that you've created your early access product, it's time to turn it into a special perk for members during the early access period. Follow these steps:
- Log in to your Single account.
- From the left sidebar, select "Memberships." You will be directed to the Manage Memberships page.
- Select the appropriate program and tier for early access.
- Click "+ Select Content" on the tier's Perks page.
- Search for and select the early access product you created earlier in Shopify.
- Set the "Permitted Purchase Quantity" as needed.
- Click "Save and Continue."
Step 3: Make the Early Access Product Publicly Available
After the early access period ends, you can open up the product to everyone. Follow these steps:
- Log in to your Single account.
- From the left sidebar, select "Memberships." You will be directed to the Manage Memberships page.
- Select the appropriate program and tier for early access.
- Find and "Archive" the early access product on the tier's Perks page. This will "un-gate" it and make the product available to everyone, not just members.
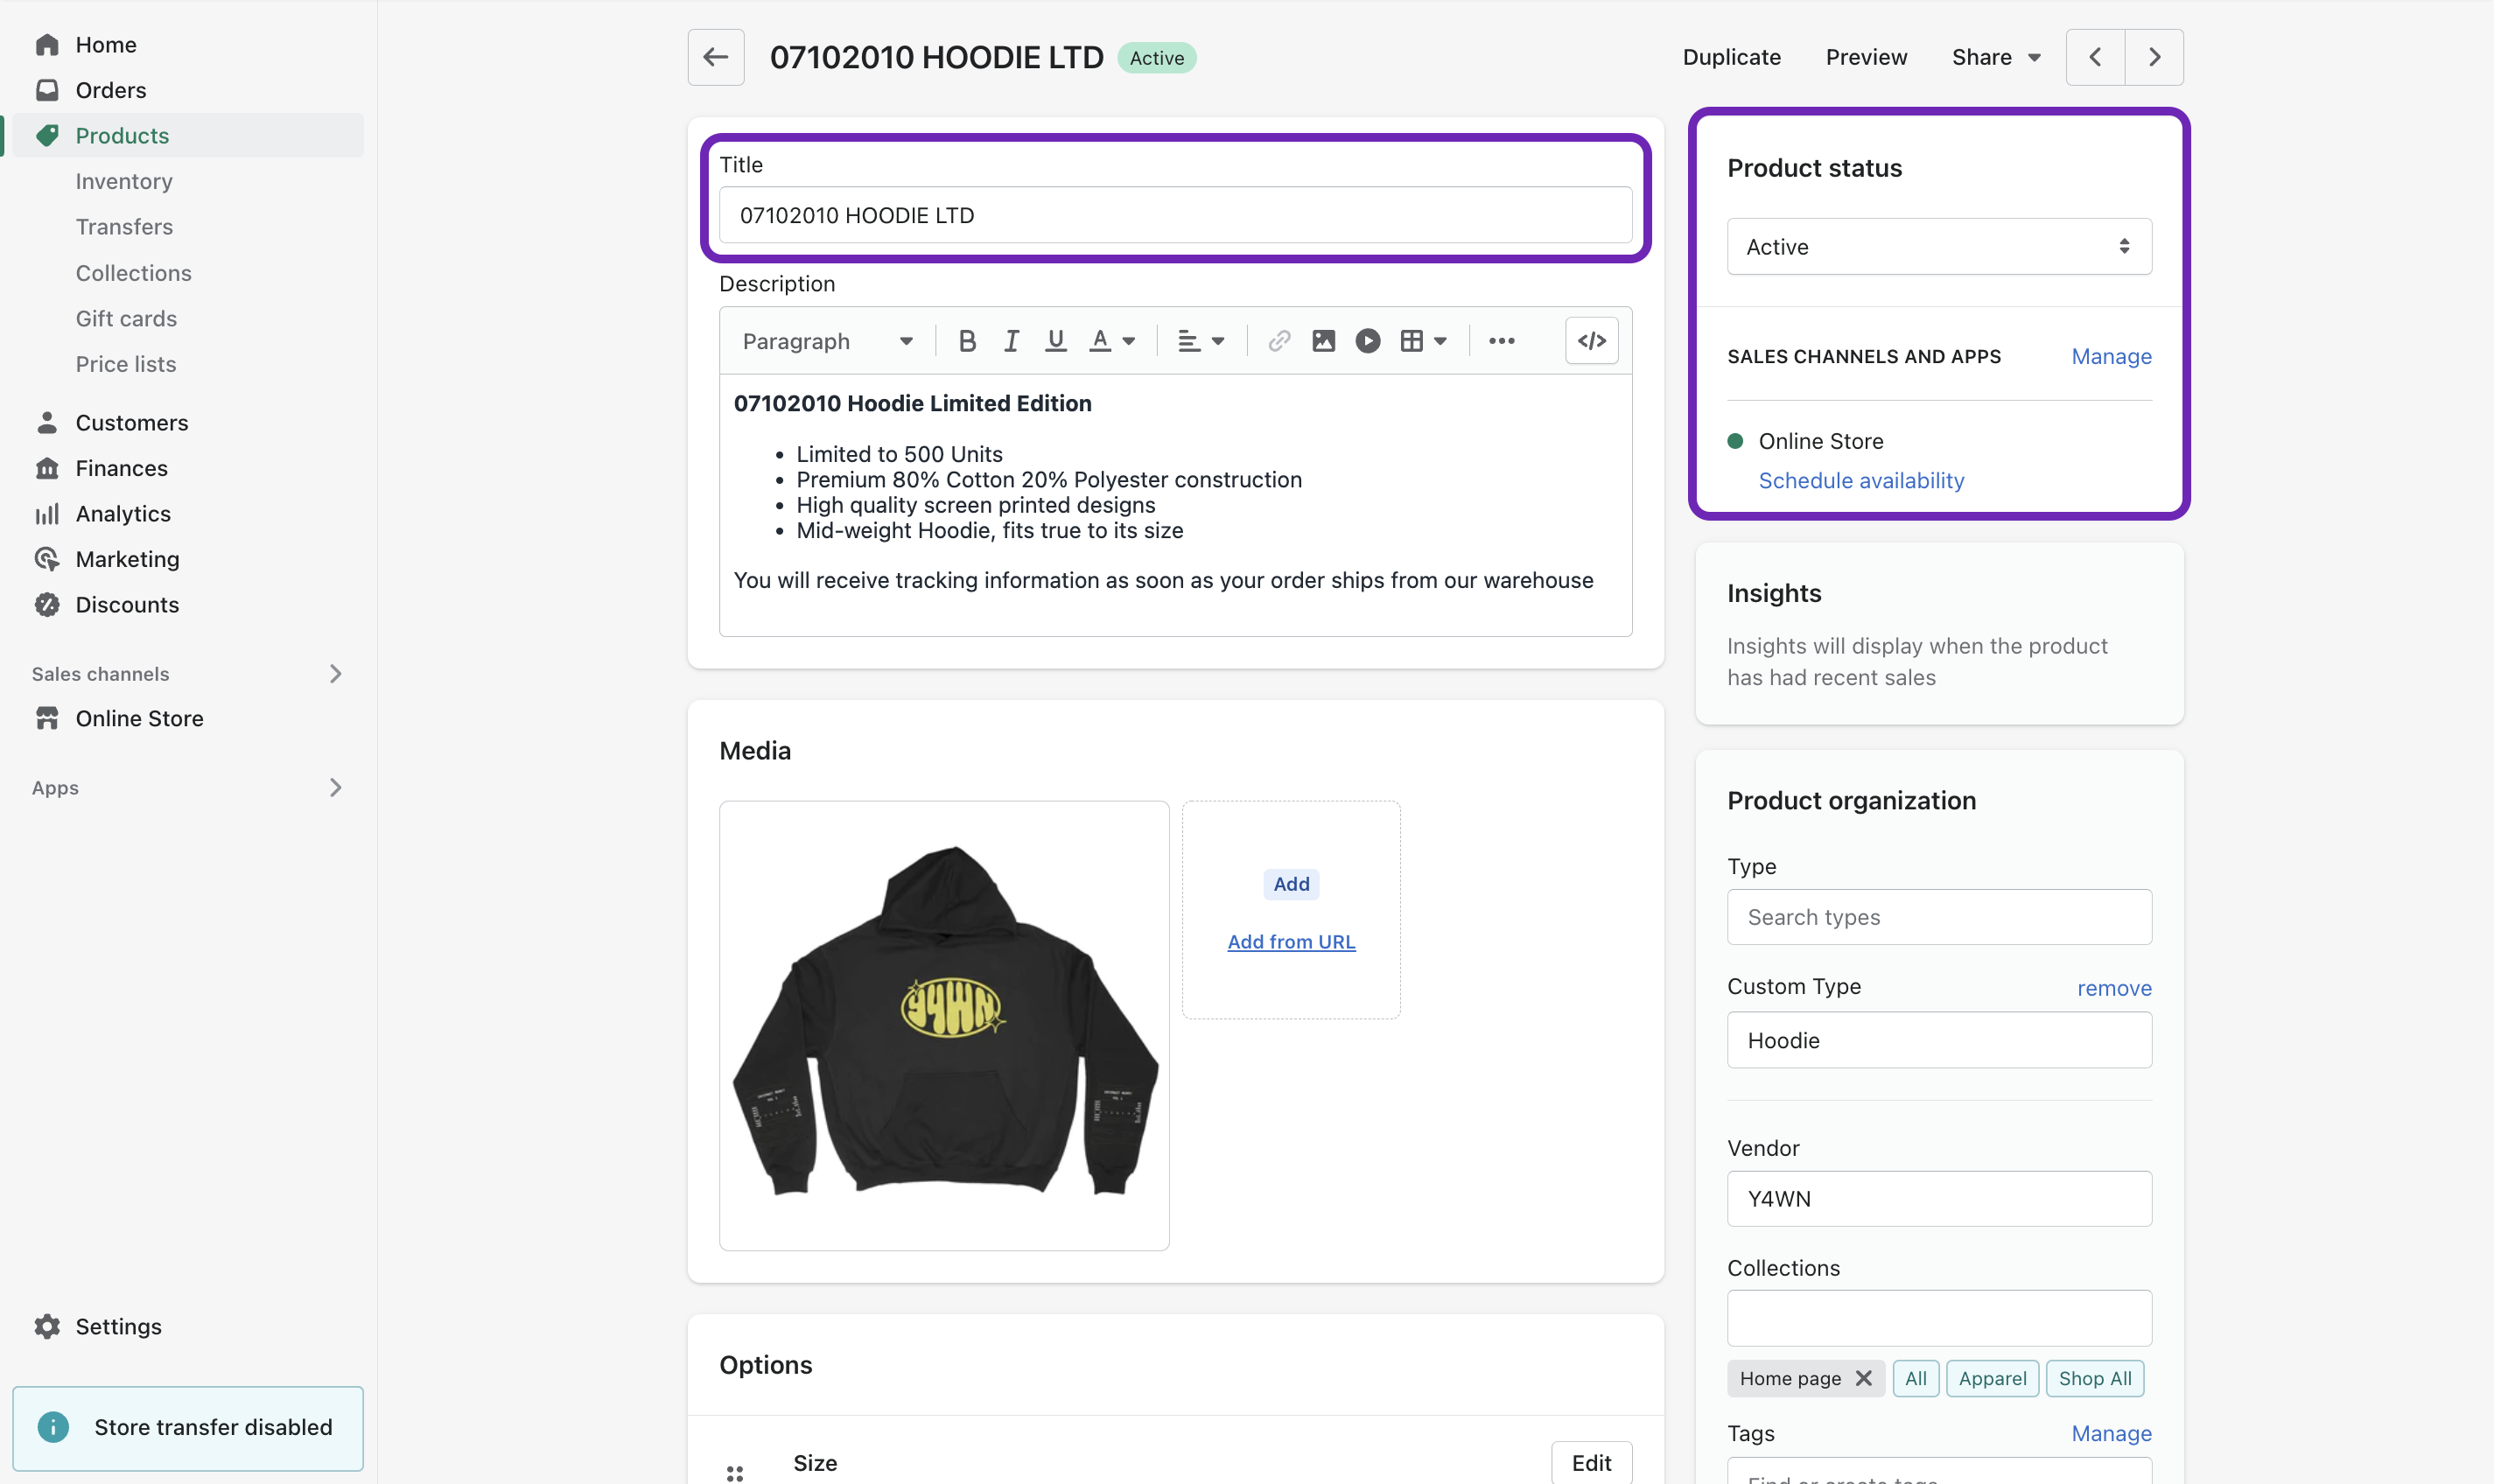
- Return to your Shopify admin and remove "(EARLY ACCESS)" from the product title, making it clear that the product is now available to everyone.
- Switch the product status to "Active" to make it visible in your store.
- Add the product to your "Online Store" sales channel by clicking "Manage" in the “Sales Channels and Apps” section.
And that’s it! If you have more questions about updating perks for tier members, see HERE.