Get Up and Running with a Livestream Using OBS
Before you actually start streaming, you’ll need to set up the OBS software. That means downloading, installing, and formatting to your preferences. Fortunately, the software is entirely free and thanks to an explosion in usage over the past few years, it’s more user-friendly today than ever. Before we get started with the steps below, here's what you'l need:
-
Laptop or Desktop (w/ web camera & built in mic)
-
Quality Internet Connection - test your upload speed HERE.
-
OBS (Open Broadcaster Software / Free App) or similar casting software.
Step 1: Download OBS and Test Your Internet Speed
First off, download OBS from their official site. Then, make sure your internet is up to speed for live streaming. Use a speed test test to check if you have an upload speed of at least 25mb/s.
Step 2: Increase Audio Quality
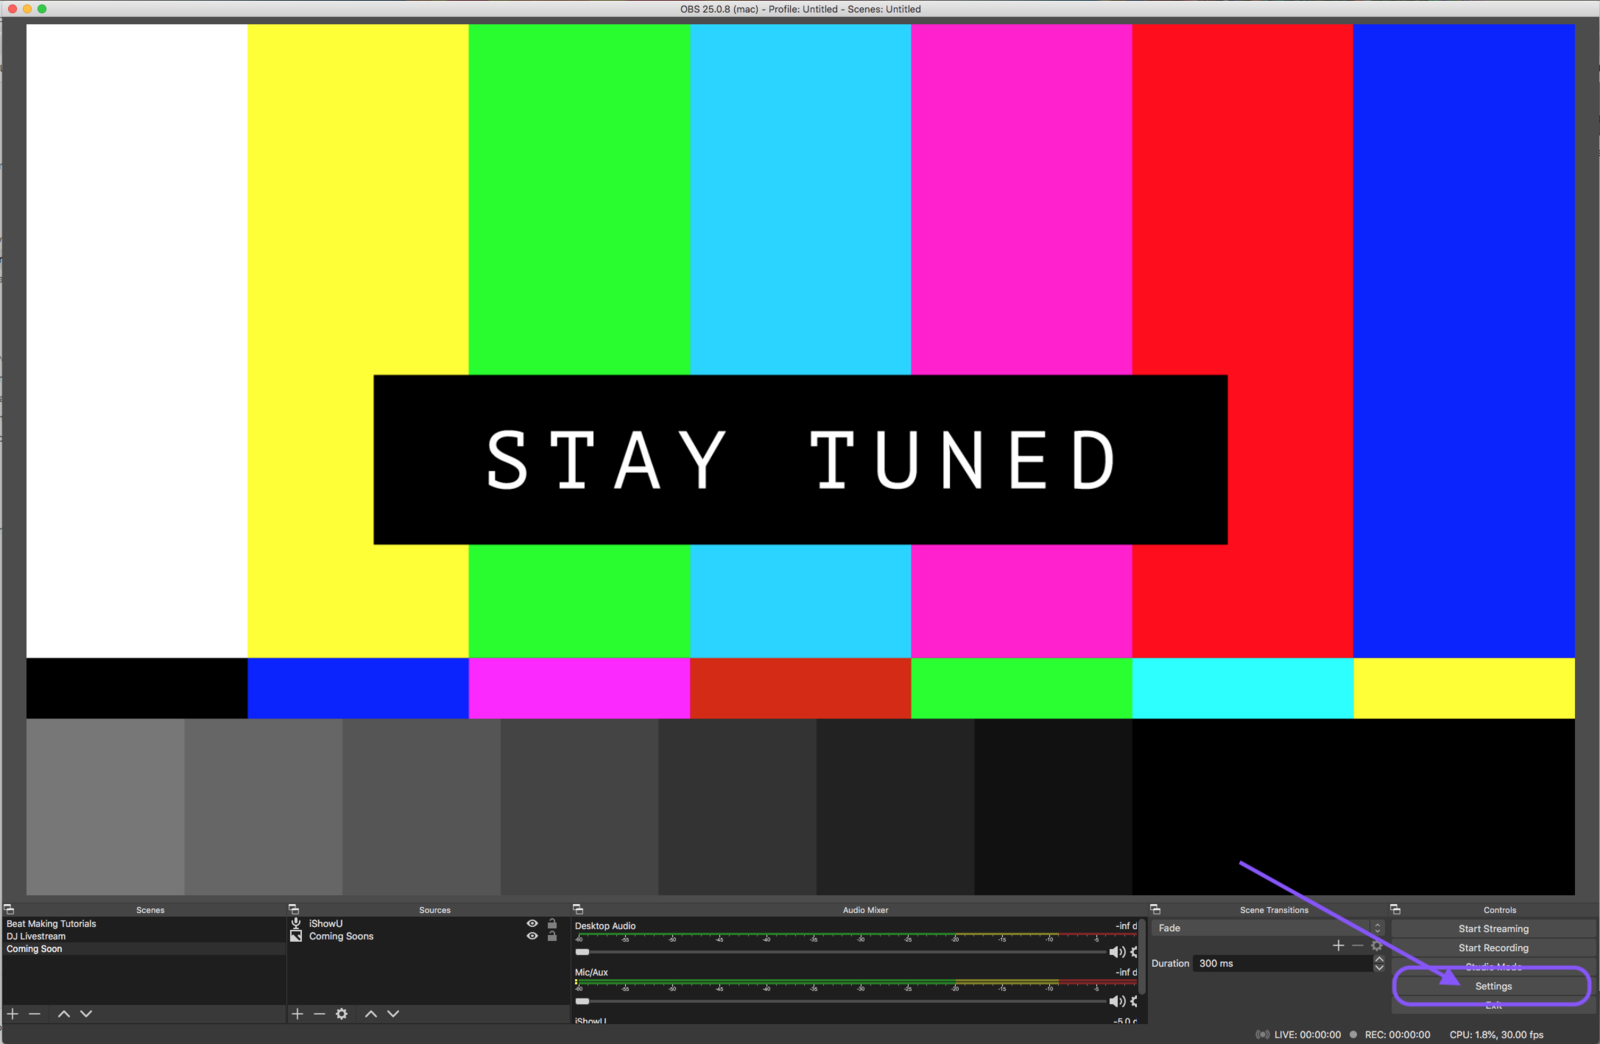
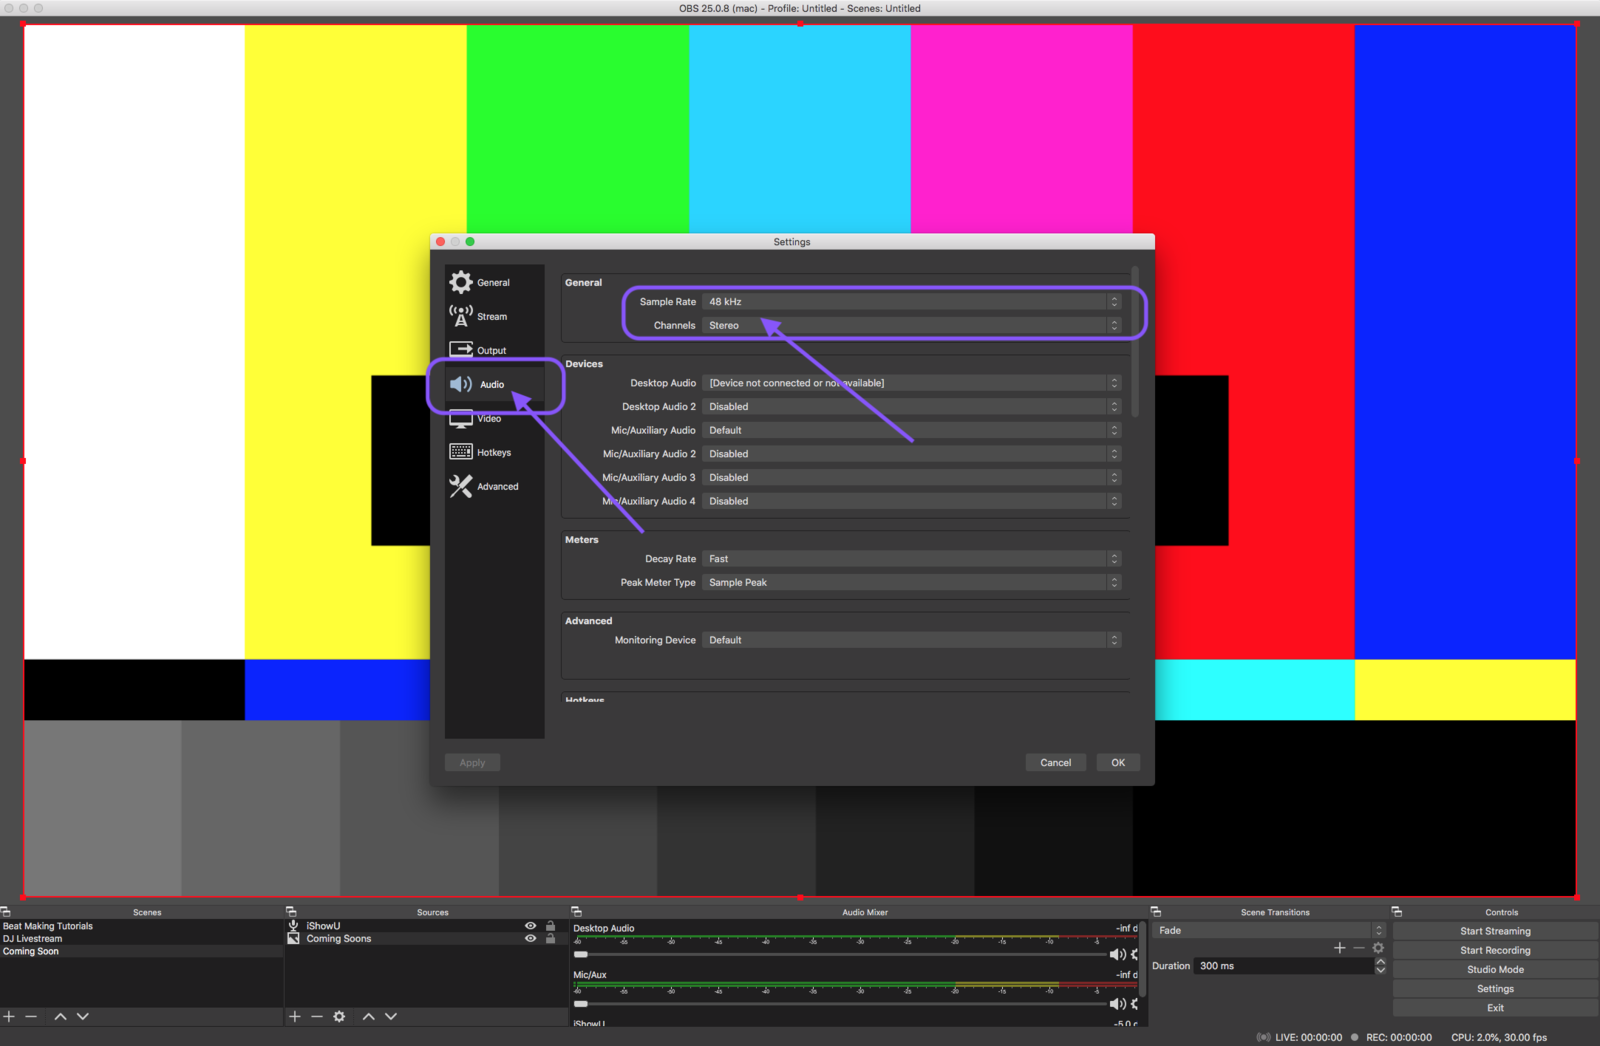
Before connecting OBS to Single, you'll need to define how your stream will operate. To do this, click on the "Settings" button at the bottom right of the OBS window, then navigate to the "Audio" tab on the left.
To make your sound clear and crisp, set the "Sample Rate" to "48 kHz" and the "Channels" to "Stereo". Also, re-check your internet speed to ensure it can handle these settings. Use the same speed test as before if you're unsure.
4. Connect OBS to Your Livestream
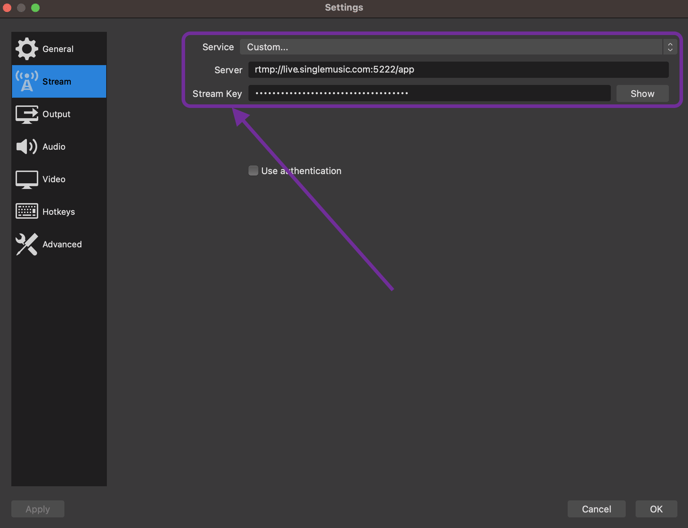
Next, navigate to the "Stream" tab in your OBS Settings. Set the "Service" to "Custom ," then input your "Stream Key" (provided by Single).
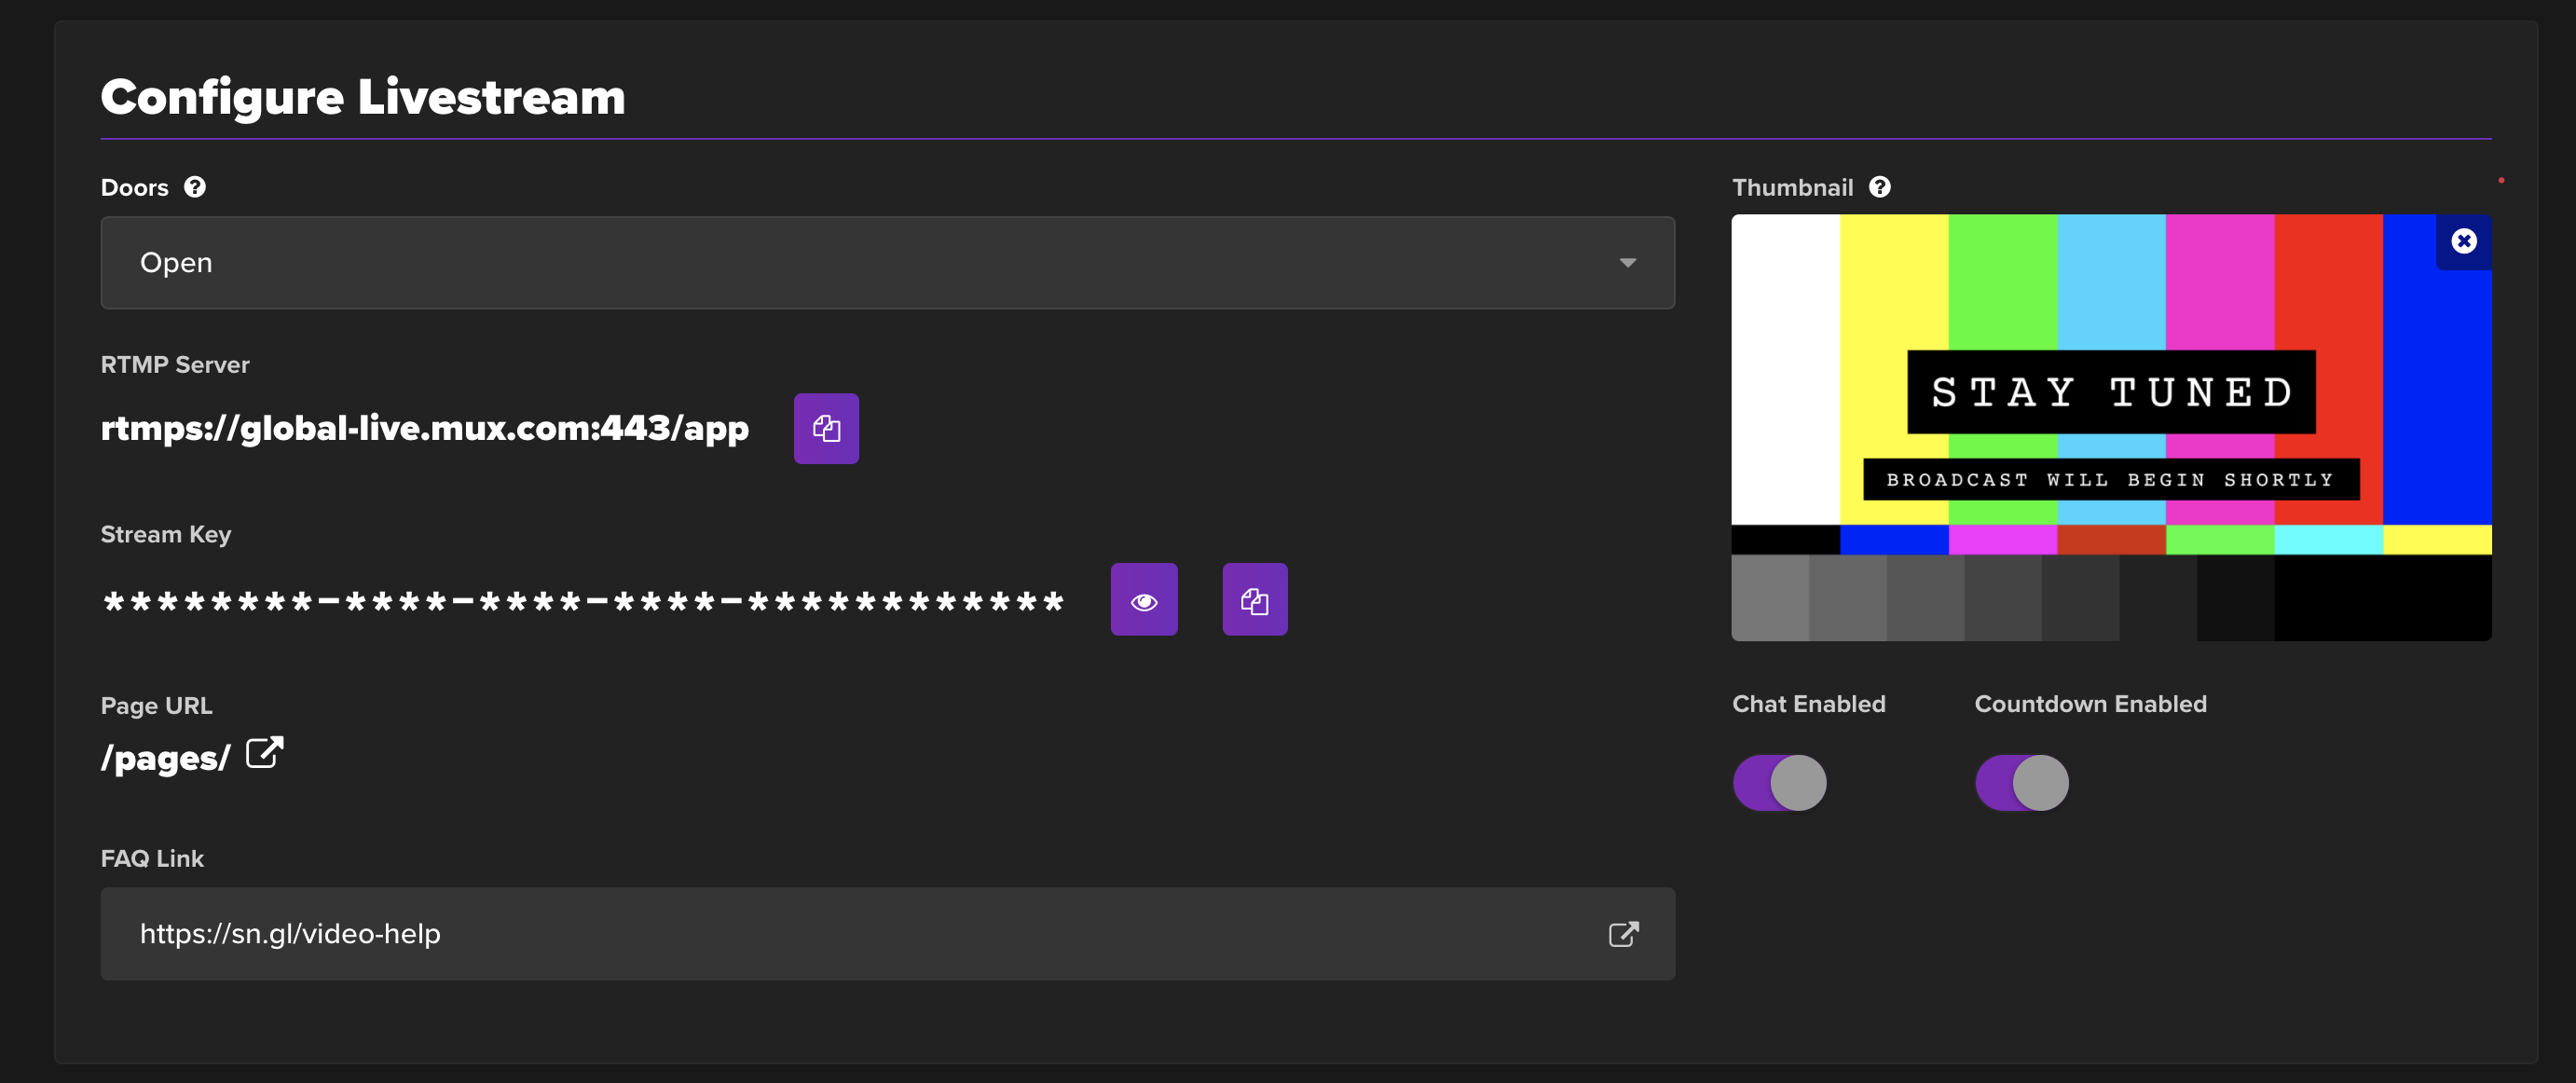
You can find your stream key in the bottom section of the Configure section in Single.
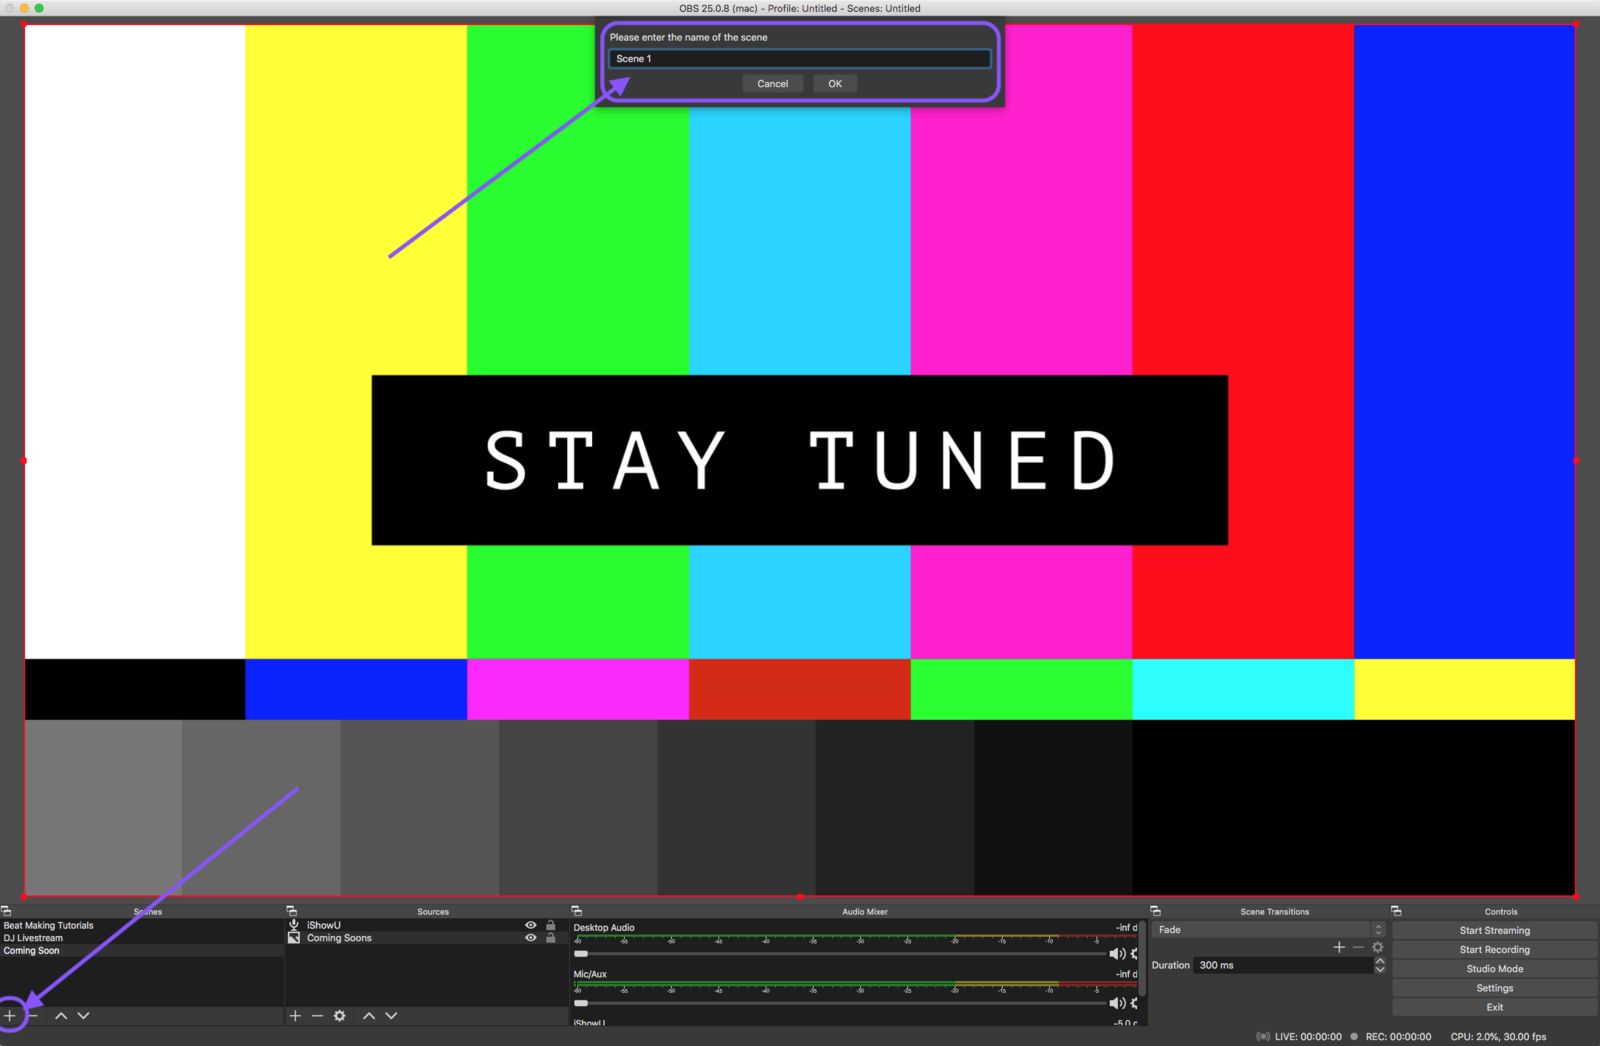
5. Set Up Your Scene
A "Scene" is like a stage for your stream, where you can add different elements (like your webcam, a video, an image, or sound) and switch between them during your stream. Every broadcast needs at least one Scene.
To create your first "Scene," click the "+" button at the bottom left of your screen under the "Scenes" box and title it whatever you want.
Tip: Use an image as a transition or 'scene' in OBS. This means you can have the main show as one scene and an event image as another scene.
Start the stream with the event image, then smoothly transition to the main scene. At the end of the live stream, you can easily switch back to the image. This technique ensures that nothing is ever cut off and provides a seamless viewing experience.
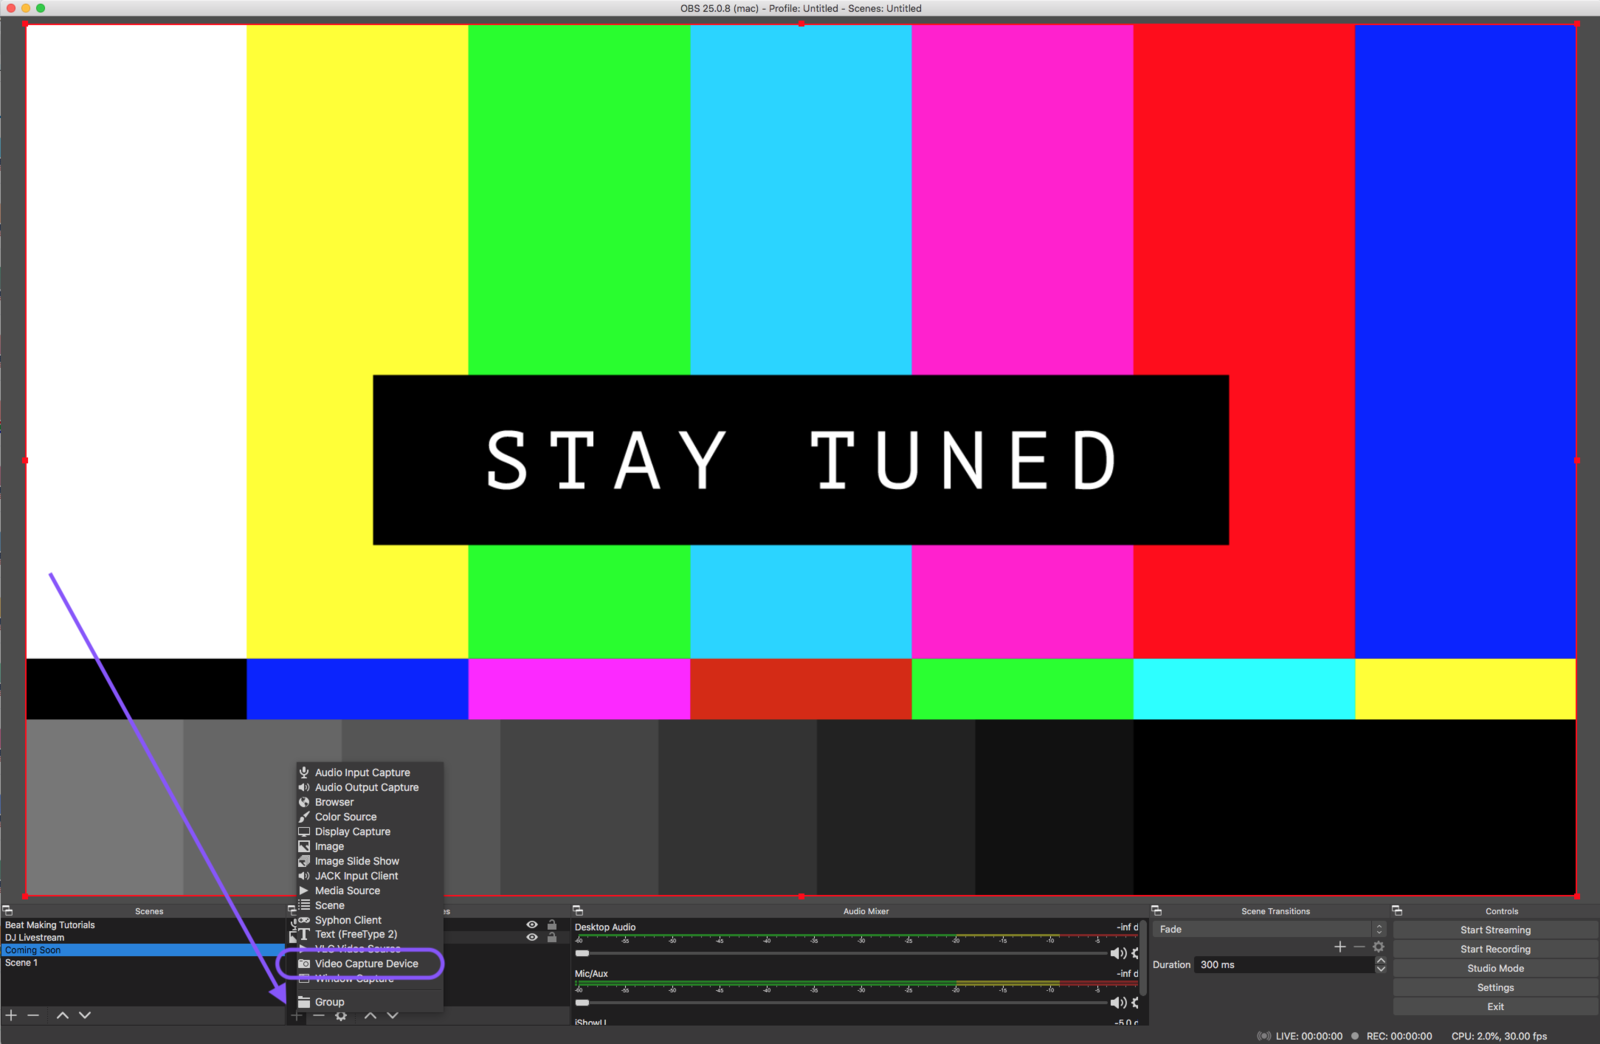
6. Enable Your Webcam
Once you have a "Scene" ready, you can add a "Source," which is an element in your "Scene". To do this, click the "+" button under the "Source" box, select "Video Capture Device," name it "WEBCAM," and hit "OK."
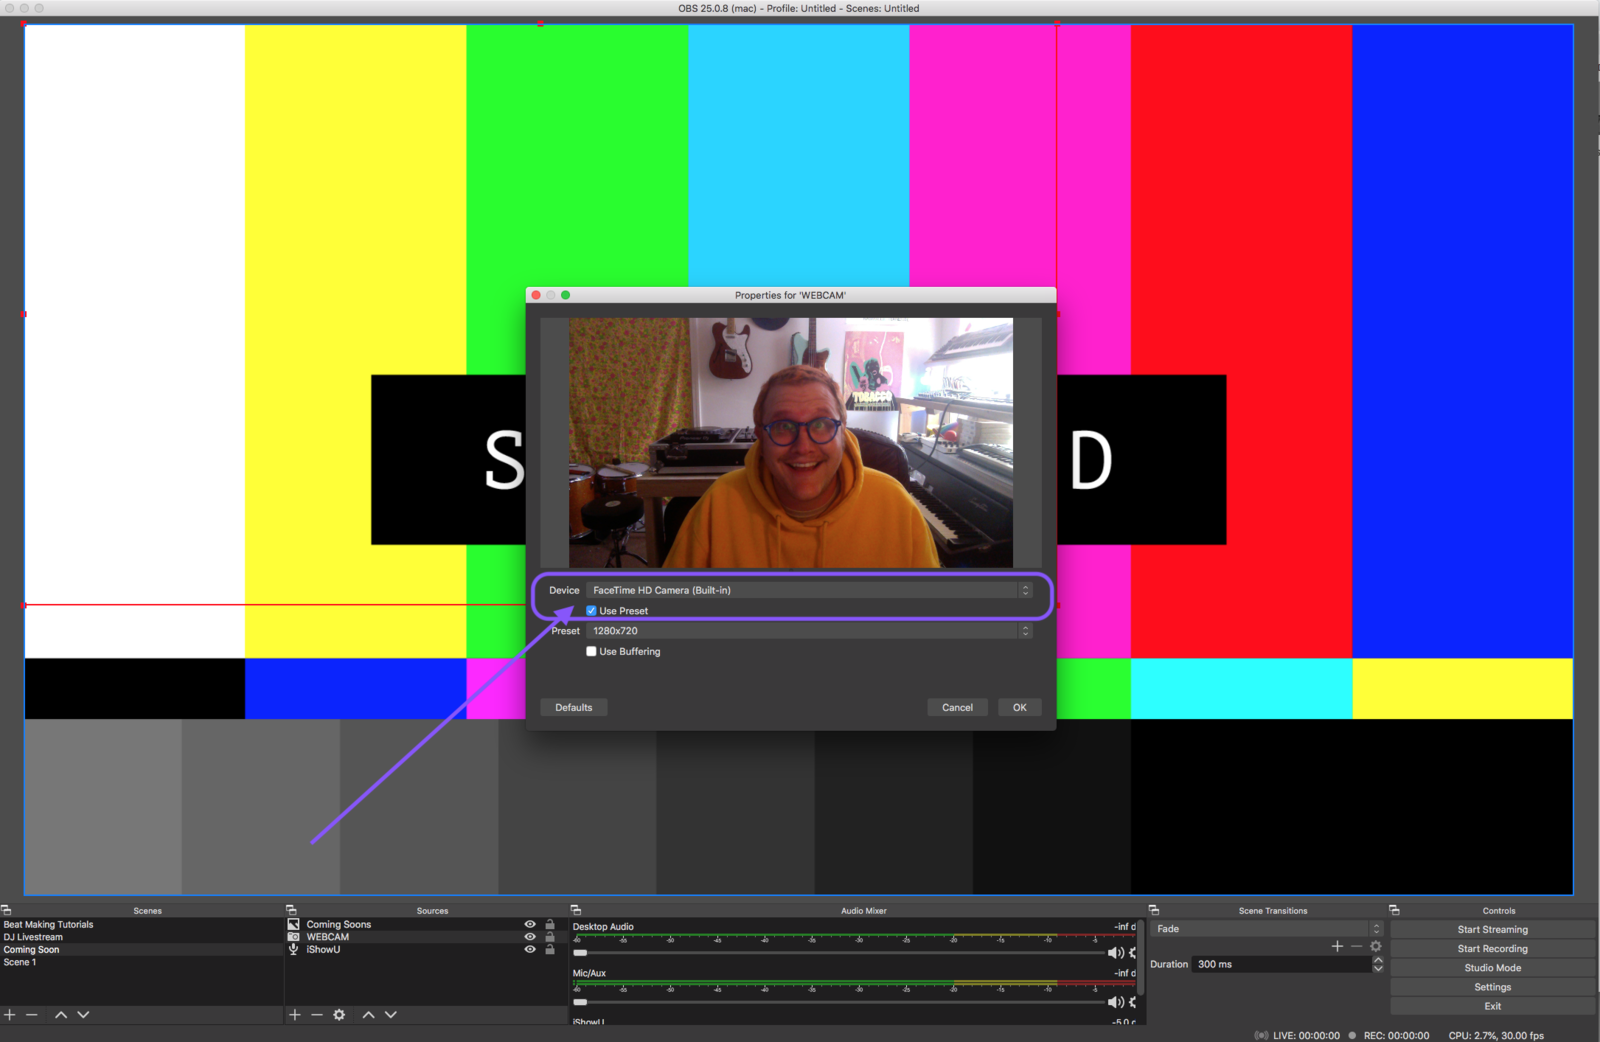
A "Properties" box will pop up, allowing you to select your webcam under the "Devices" dropdown.
If you're using a Mac's built-in camera, choose "Facetime HD Camera (built-in)." If you're using a different webcam, find it in the "DEVICE" dropdown and click "OK."
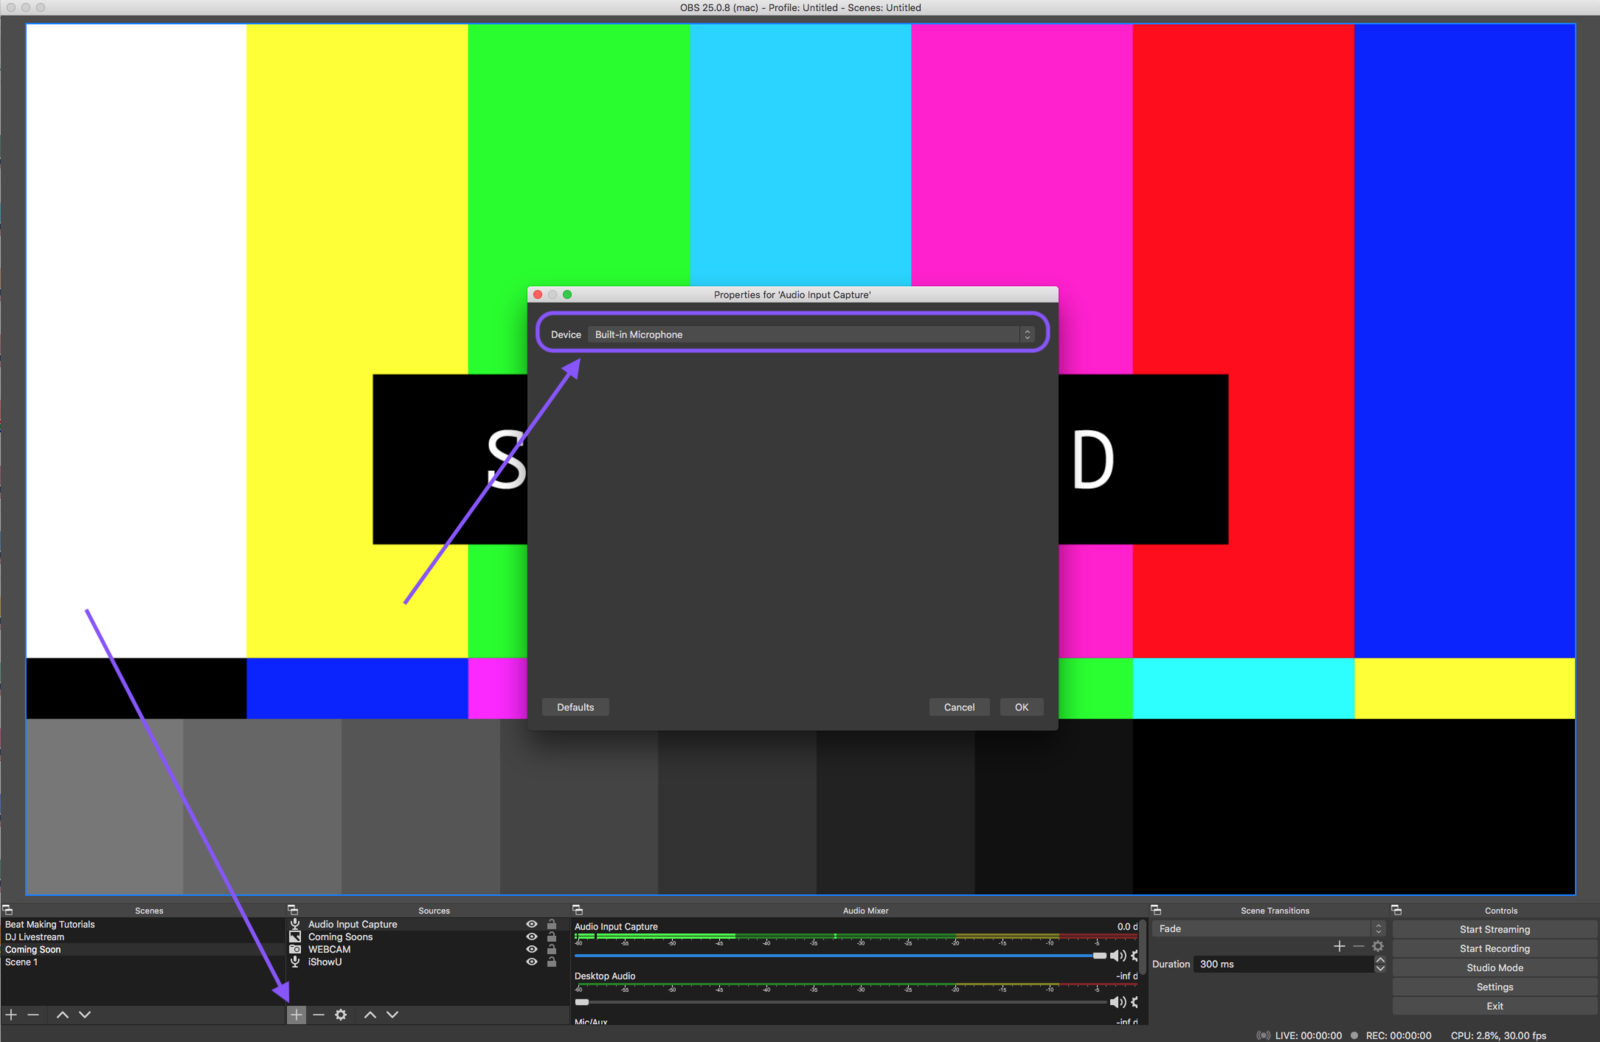
7. Choose Your Audio Inputs
Finally, it's time to add an "Audio Input." Click the "+" button under the "Source" box, select "Audio Input Capture," name it "AUDIO INPUT," and click "OK."
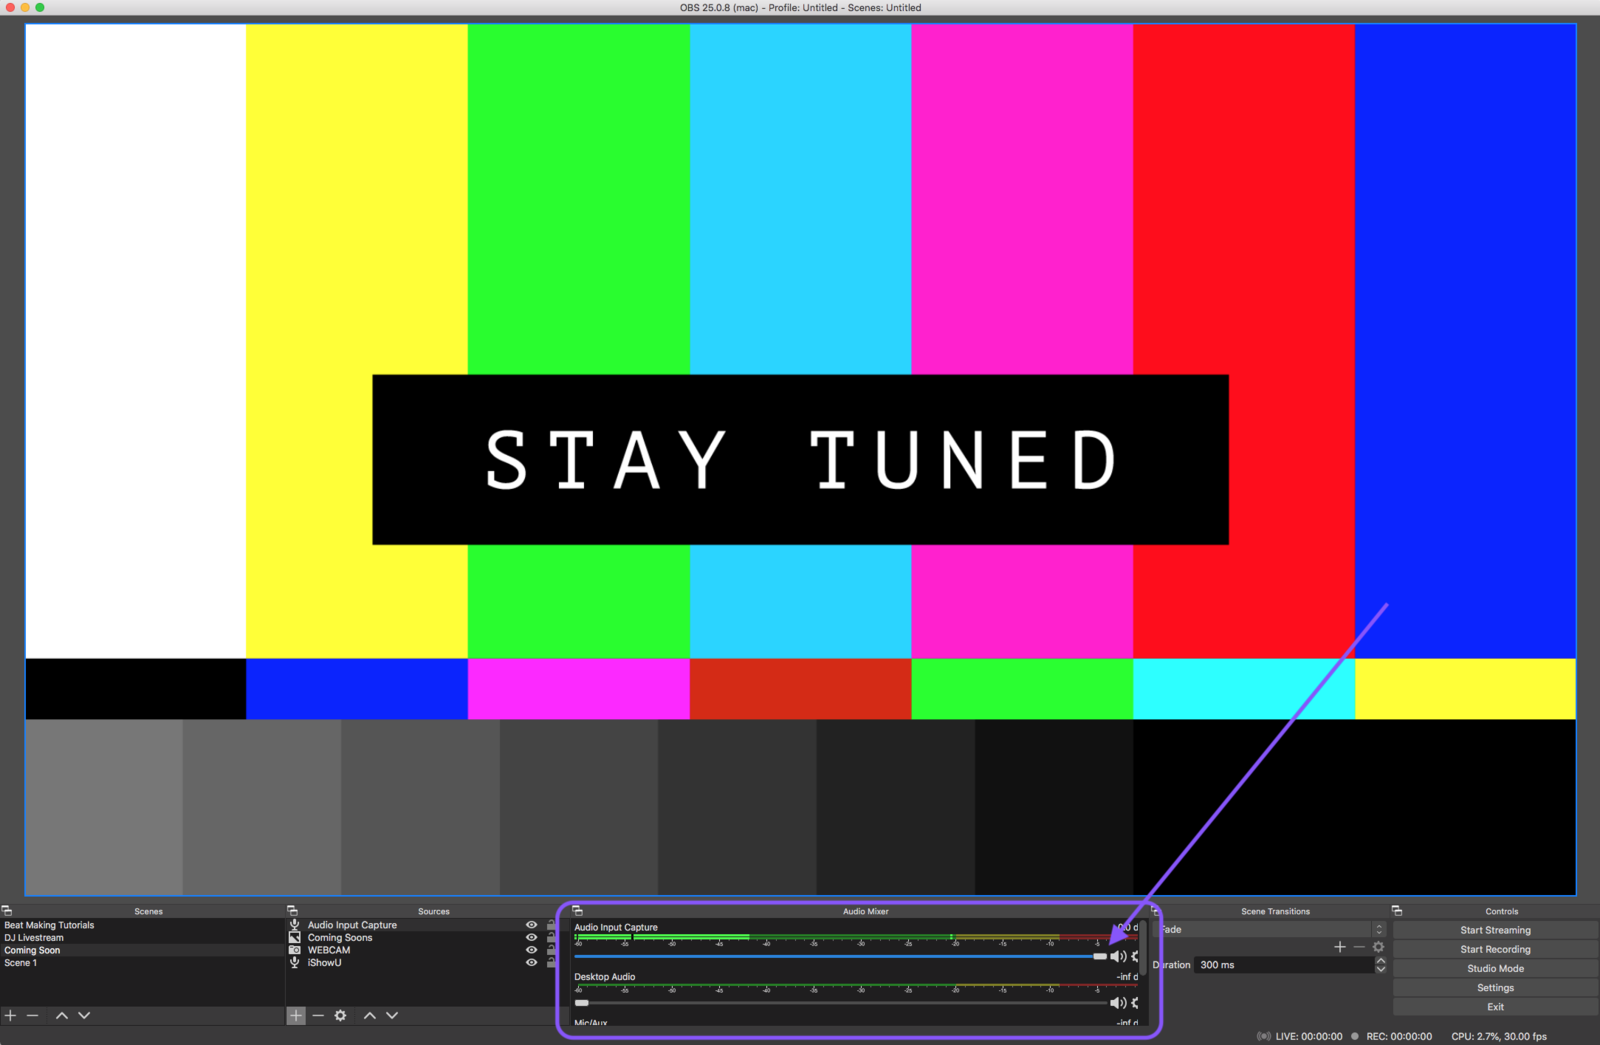
Then, pick the "Device" you're using as your audio source. Choosing your "Built-In Microphone" as the "Device" is one of the easiest ways to get external audio into OBS.
Once selected, you can adjust the audio volume in the audio mixer at the bottom center of your OBS window:
Note: If you want to stream to multiple platforms (your Shopify store and Twitch at the same time), here's a video tutorial on how to do that. Alternatively, you can consider using a paid streaming software like Restream.io or StreamYard.