Uploading an extensive digital catalog to Single is now easier with the DDEX (Digital Data Exchange) standard. This feature is beneficial for artists, labels, and content distributors who want to avoid uploading each release individually. However, anyone can use this feature as long as their catalog is in DDEX format.
How It Works
DDEX streamlines the catalog upload process by employing a structured format for your digital content. To get started, prepare your catalog in a DDEX-compatible format. You then have two options for uploading to Single:
- Directly through the Single app, or
- Using an SFTP client.
Before You Start
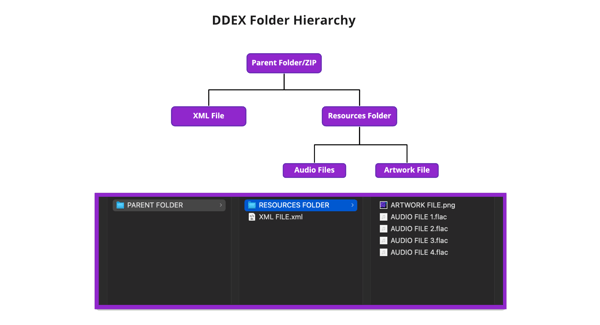
Ensure you have a ZIP file prepared, containing the DDEX message .xml file along with any related resource files, such as album artwork and lossless audio files (WAV or FLAC). Remember, each album should be in its individual folder or ZIP file. The naming conventions for these folders and files depend on your specific content. Your uploads should adhere to a designated folder hierarchy, as outlined in this example:
Uploading Your Catalog
Option 1 - Upload via Single
The most commonly used method to upload your DDEX standard files is to do so directly within the Single app.
Steps
- Log into your Single account.
- Go to Music > Digital Delivery from the left sidebar.
- Select Bulk Import
- Upload ZIP files or uncompressed folders with DDEX standard contents by dragging and dropping or clicking in the upload field.
Option 2 - Upload via SFTP Client
Alternatively, you can use an SFTP client to establish a direct connection between your device and Single's server, facilitating the upload process.
Step 1 - Request FTP Access
- Log into your Single account.
- Go to Settings > Advanced from the left sidebar.
- Select Request Access in the SFTP Access section.
- Fill out all fields of the form, either type in OR attach your public key file.
- Submit the form, and our team will send you the login details.
Note: If you need help generating an SSH key pair, please refer to this helpful article. We are unable to generate and provide a key pair for security reasons.
Step 2 - Set Up Your SFTP Client
After receiving your login information, input it into your preferred SFTP client, such as FileZilla, which you can download and open. Locate the Site Manager button.
Next, enter the information in the fields in the Site Manager tab:
- Click the New Site button.
- Select SFTP - SSH File Transfer Protocol from the Protocol dropdown.
- Enter sftp.singlemusic.com in the Host field.
- Leave the Port field empty.
- Choose Key File for the Logon Type.
- Enter the username provided by Single.
- Use the Browse button to locate and select your private key file. Note: this one doesn't end in ".pub").
- Leave the Background Color dropdown as None.
- Leave the Comments field blank.
- Click the Connect button.
Things to note:
- You may encounter popups asking to save passwords and trust the server. Choose any password option and check the always trust box for the server to continue the connection.
- Once the connection process is complete, you will receive a confirmation at the top of the window indicating that the connection was successful.
See the below video for an example:
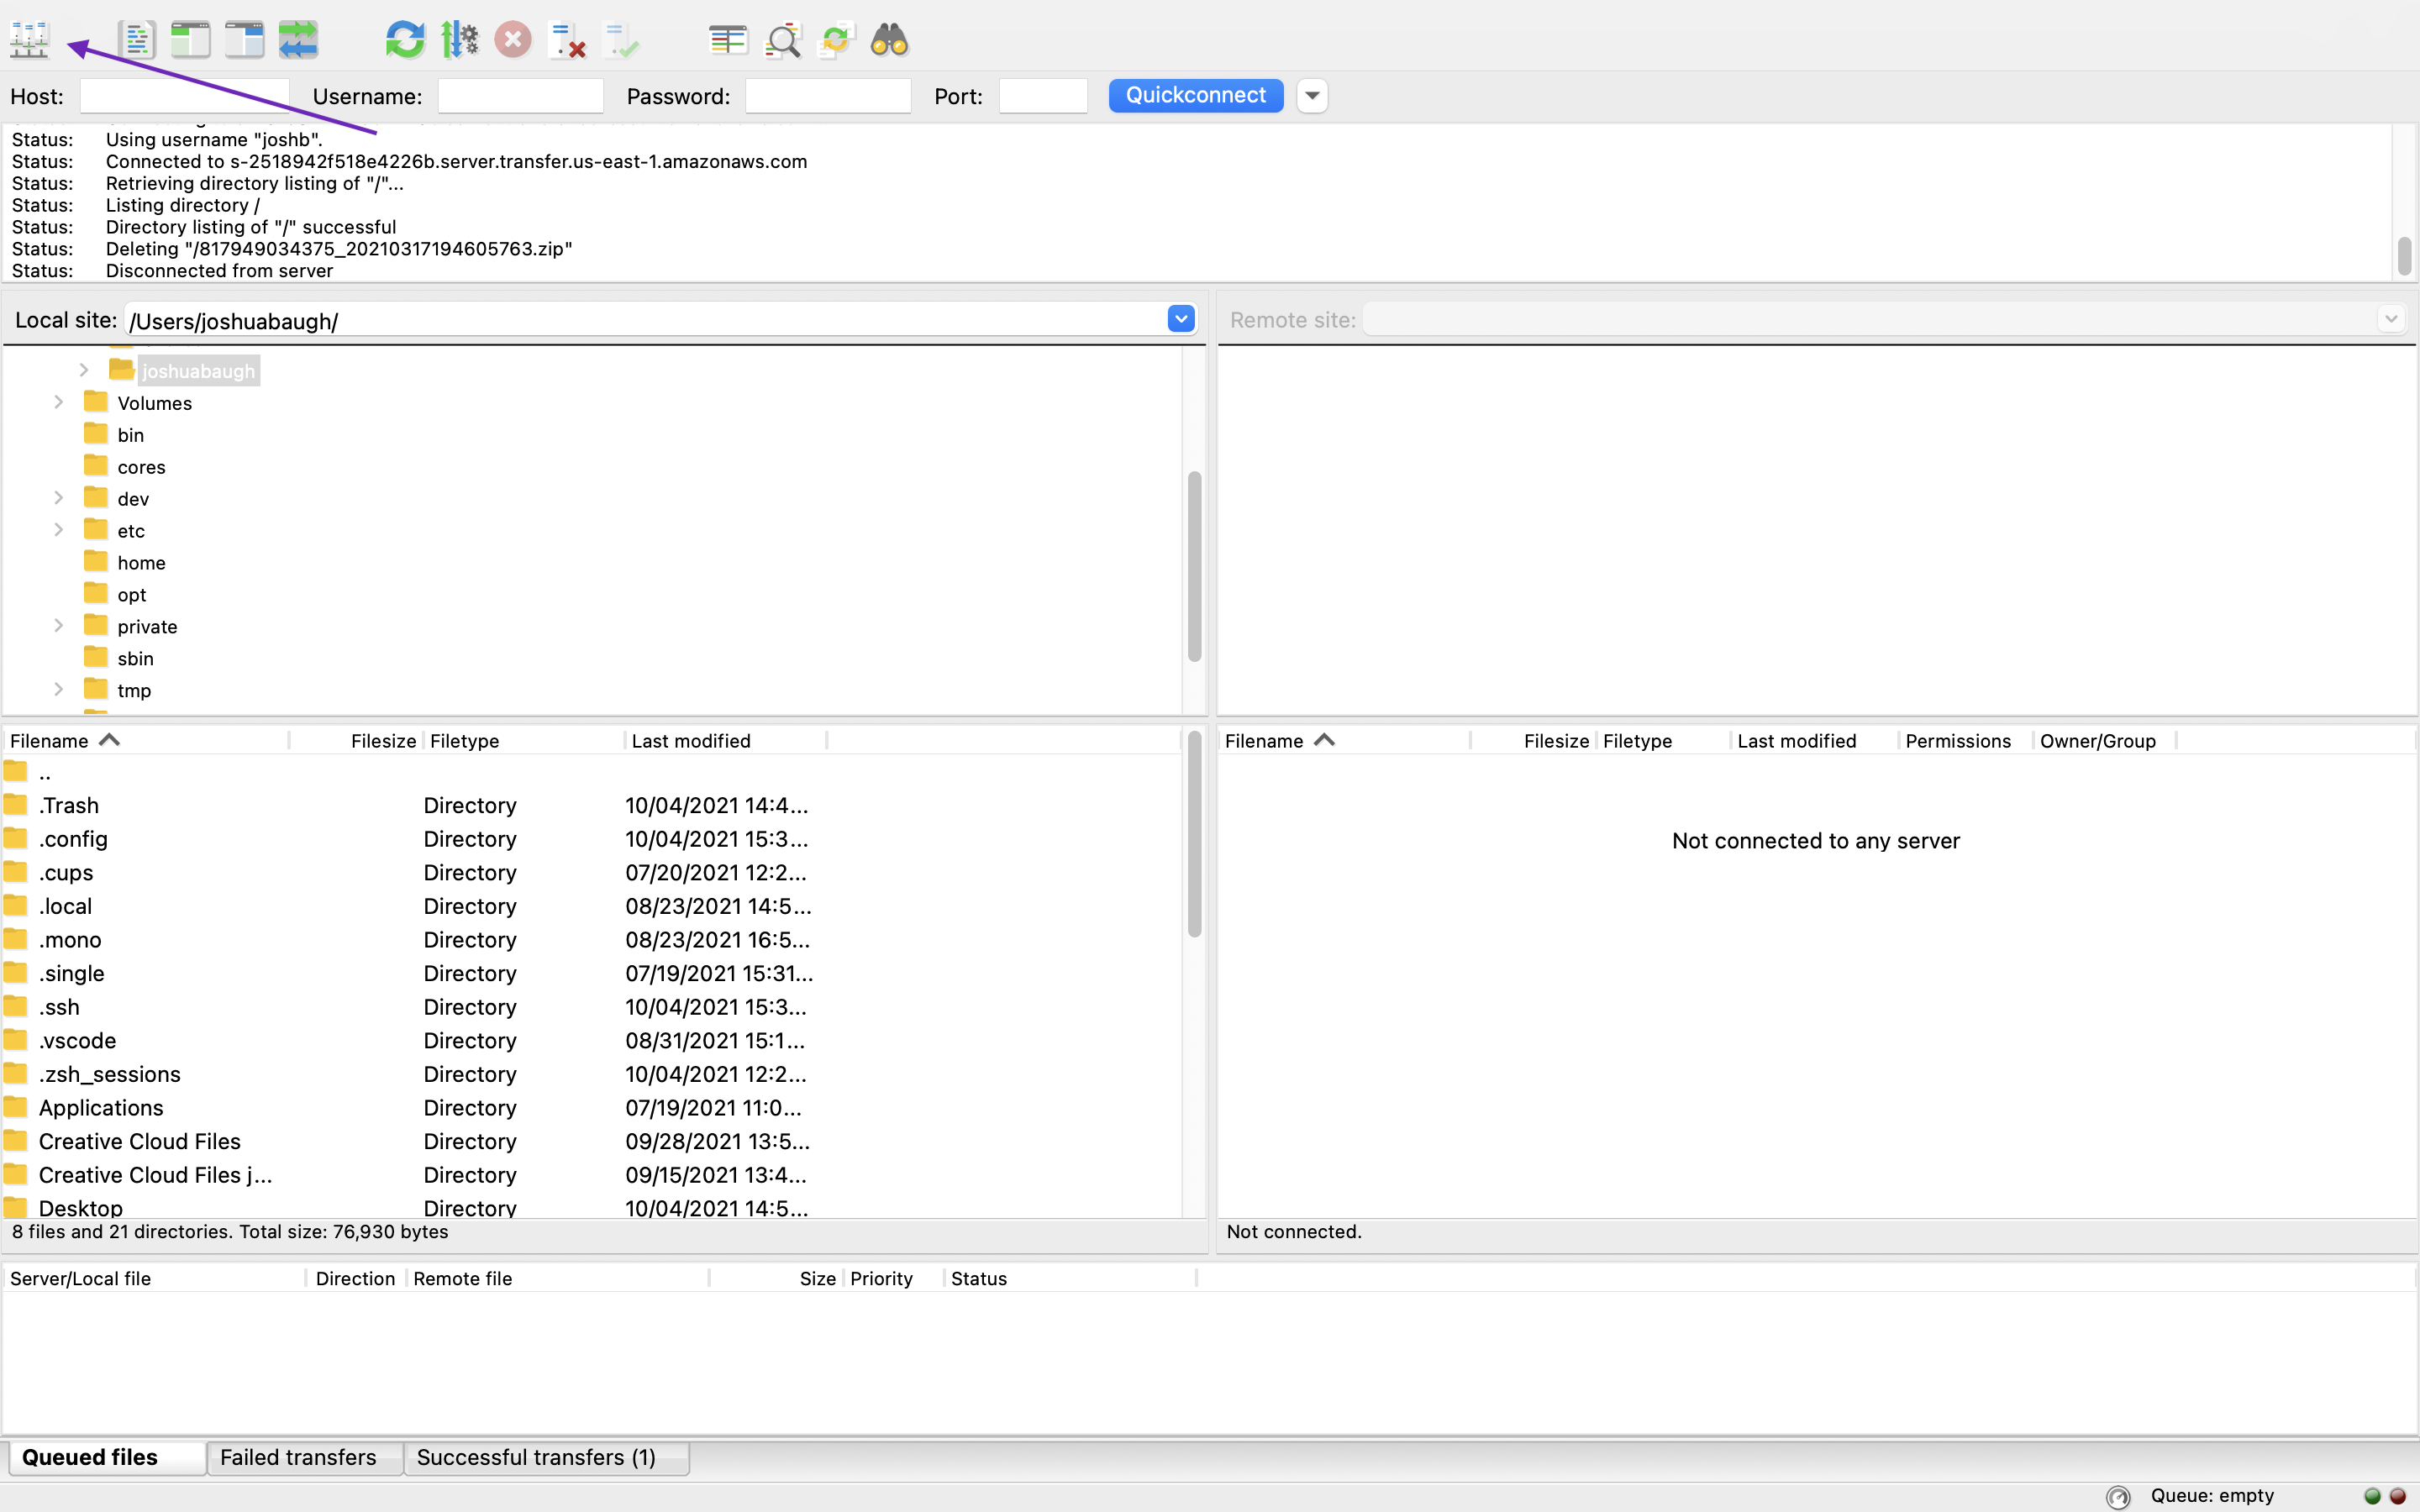
Step 3 - Upload Files With the SFTP Client
At this point, you can start dragging your folders/ZIP files into the bottom right pane of the window. You’ll see the content begin to upload on the bottom.
Editing and Publishing Your Release
Once you have uploaded a ZIP file or folder using one of the methods mentioned above, your release will be stored in the Digital Delivery tab of Single in a draft state. This allows you to review and make any necessary adjustments before publishing your release to your store.
Steps
Once you have finished uploading your ZIP file or folder, you can click on Manage Bulk Uploads to access the details of your upload.
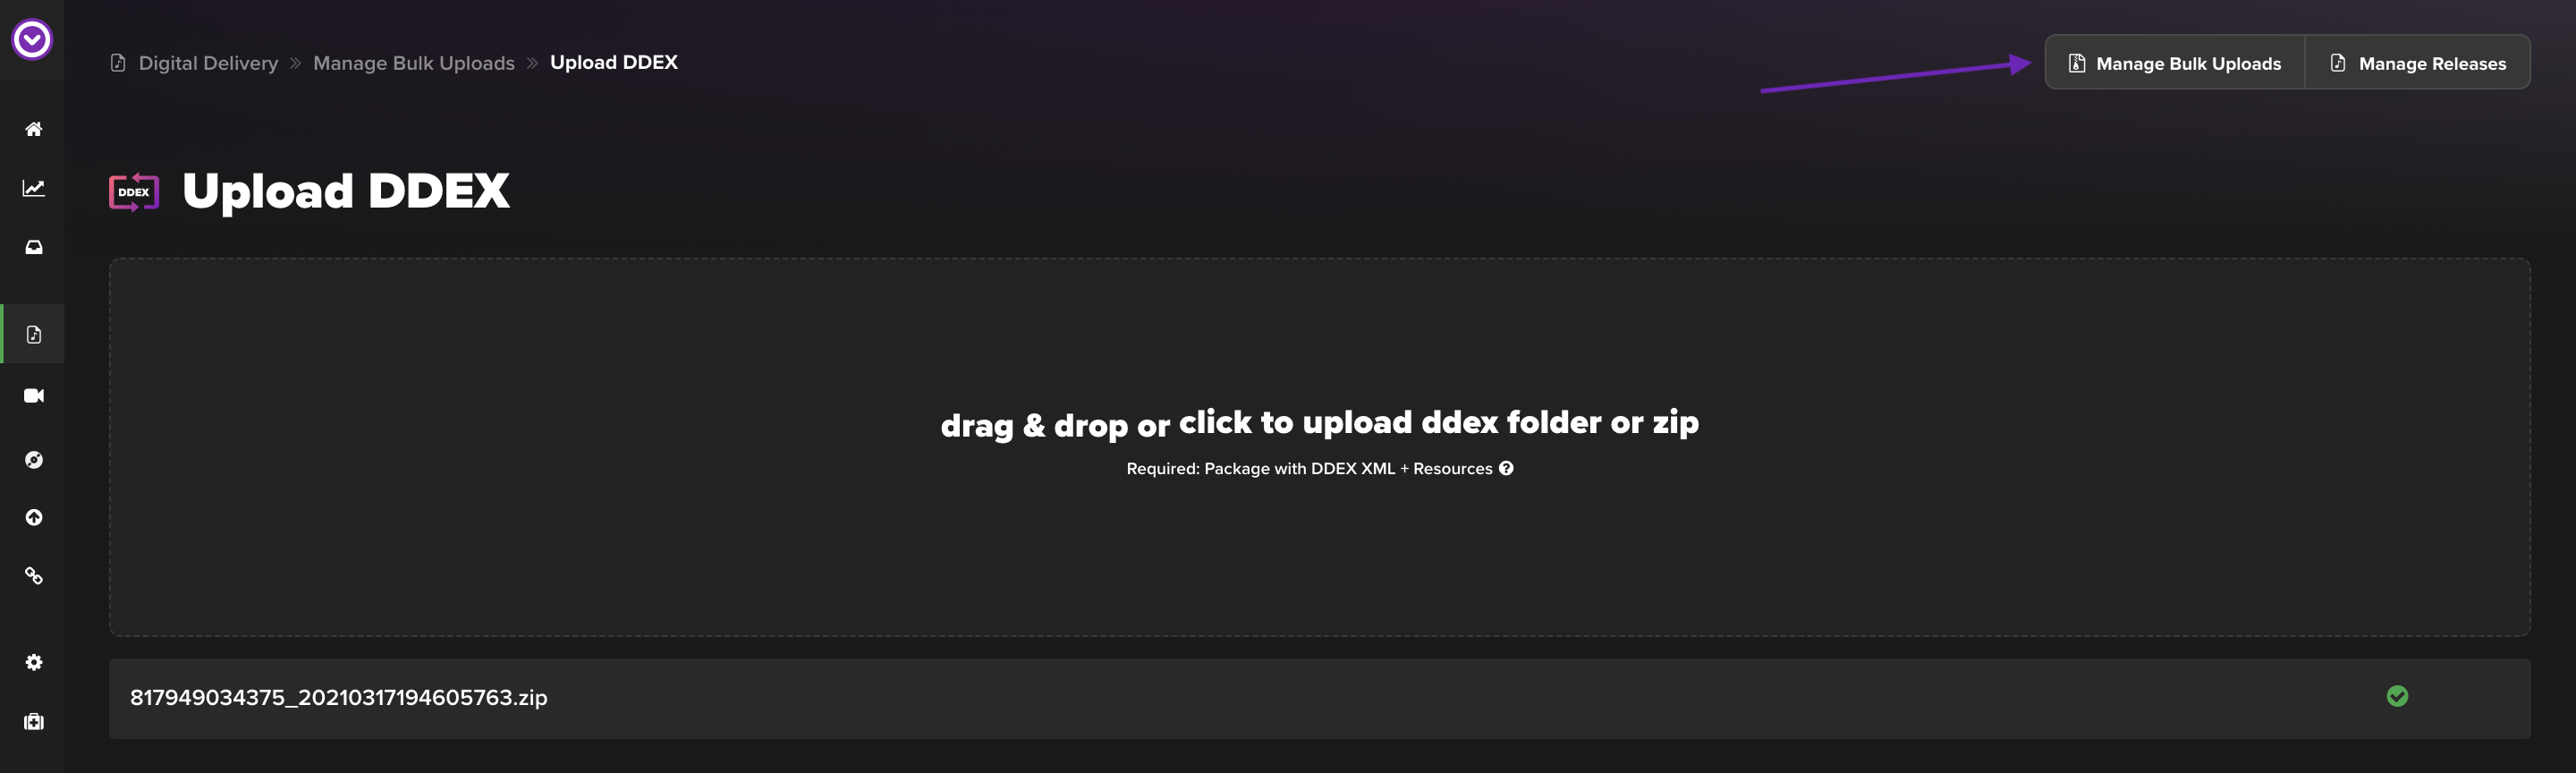
On this page, you will see the processing status of your upload as it goes through each step. Click the drop down icon next to the file name to see more detail.
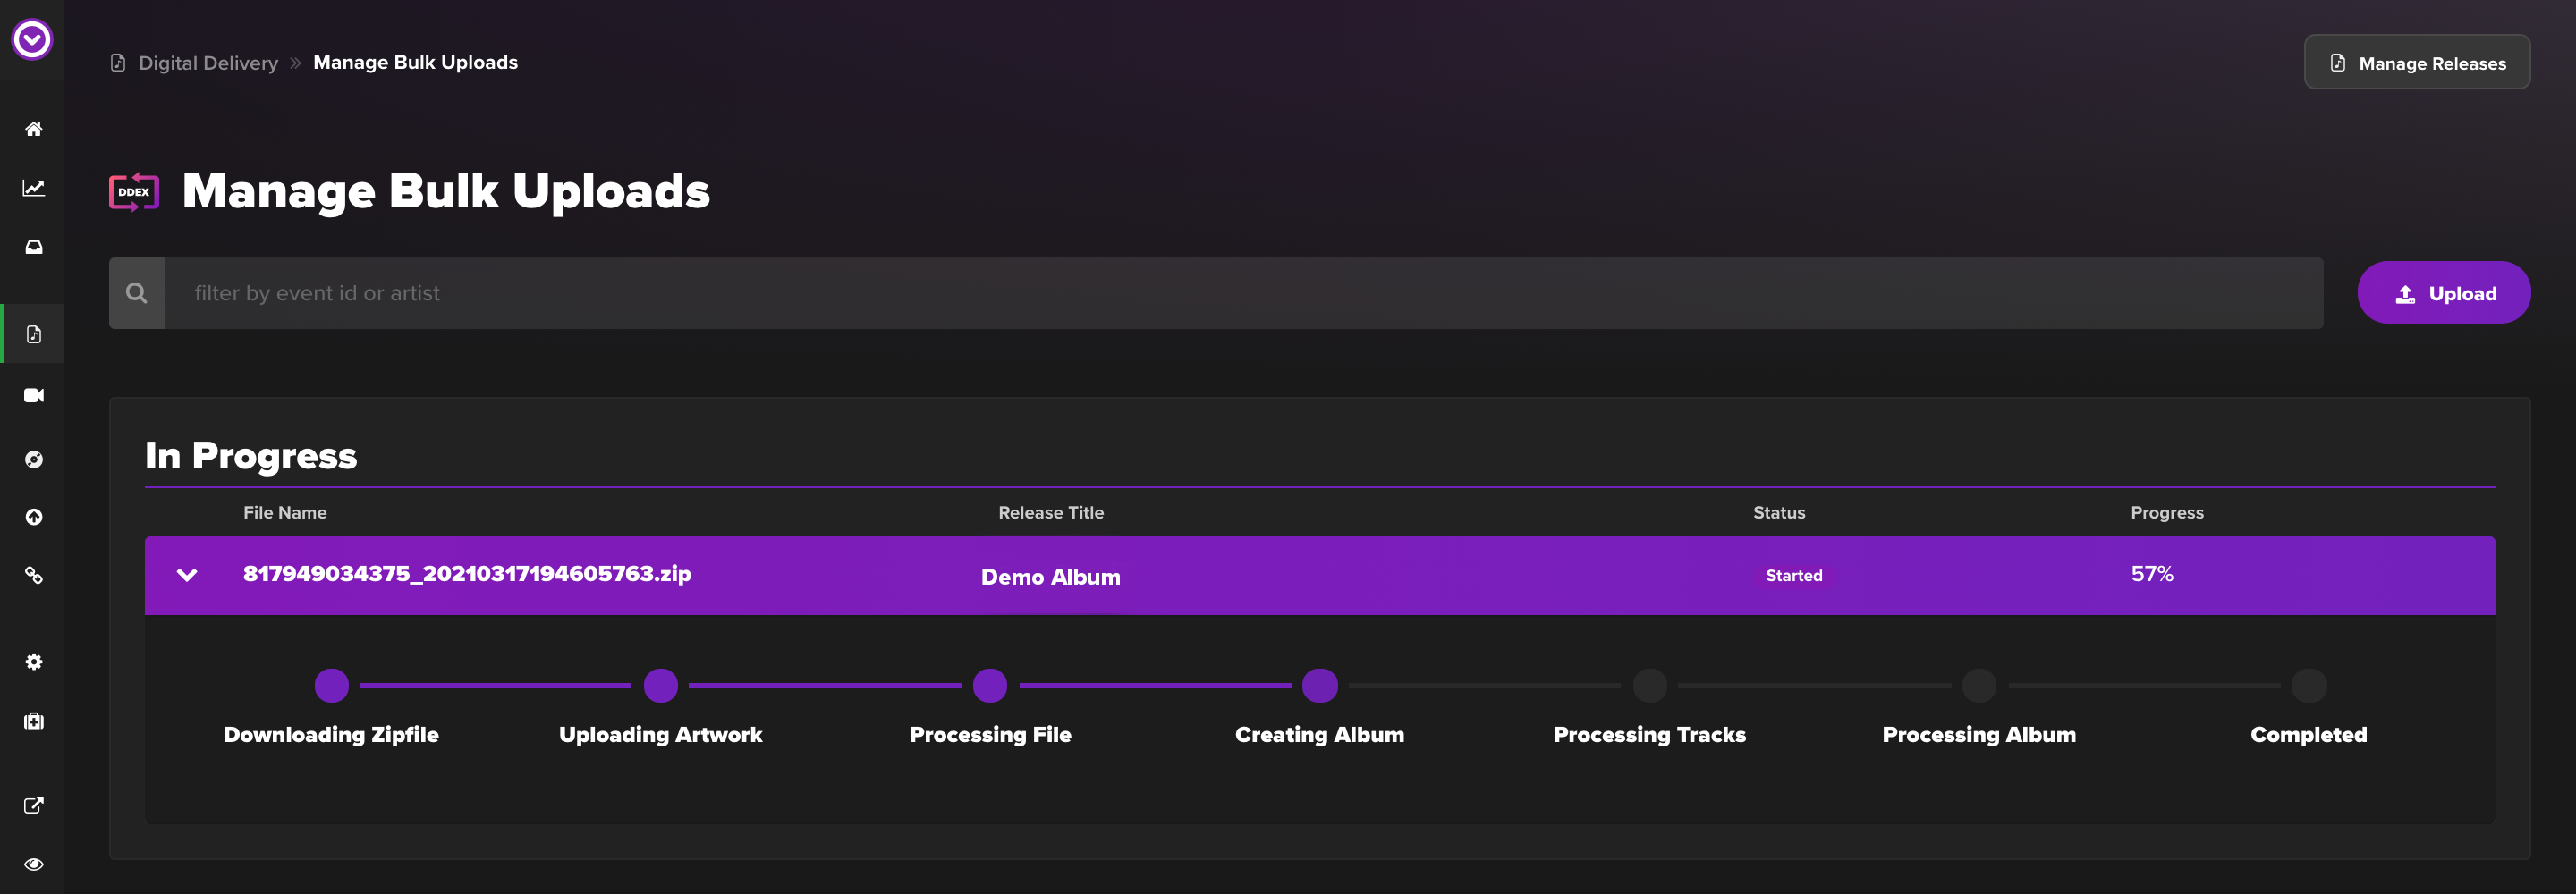
Once processing is complete, successful releases will move to the Completed list where you can view release details from the drop-down menu.
Click "View Release" to review and adjust release information before publishing.

If the album processing fails, it will be moved to the Failed section. You can click the drop down icon next to the file name to see details as to why it failed. Once you have corrected any issues, go ahead and re-upload your file.
Note: The processes for editing and publishing your release are the same as for any other digital release. You cannot edit a published album by uploading an altered DDEX file with the same album. For more information on editing and publishing your releases, please refer to our support articles: