White labeling your delivery emails adds a professional touch and aligns your messages with your brand. If you're a Bronze, Silver, or Gold tier subscriber in Single, you can customize the delivery emails sent to fans when they purchase from your Shopify store.
Anatomy of a White Labeled Email
Example screenshot of key white-labeled email components:
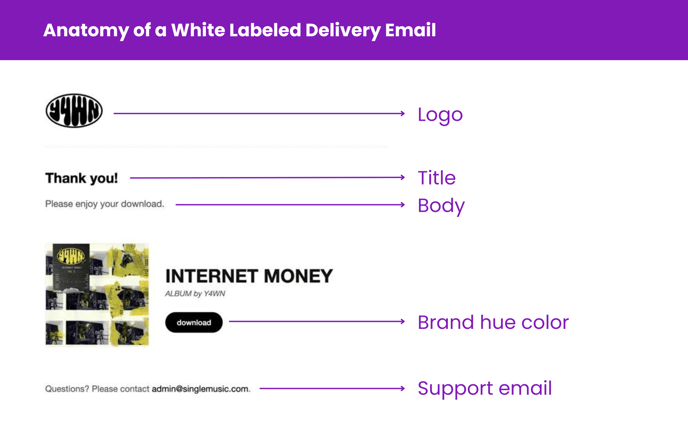
- Header Logo: Your brand's logo (JPG, JPEG, PNG, RGB, < 20MB required, recommended size: 600 x 130 pixels).
- Primary Color: Updates the email's button color.
- Title: A small header of text that appears at the top of all delivery emails.
- Body: A small body of text that applies to all delivery emails.
- Support Email: Included in the footer for customer support.
Steps to Enabling White Labeling
- Log into your Single account.
- From the left sidebar, go to Settings > Notifications.
- Enable the White Label toggle and add the following:
- Primary Color
- Header logo
- Title
- Body
- Next, add and configure your delivery settings:
- Customer Support Link - this will be listed in the email and used for replies
- Customer Support Email - this will be linked in the email footer
- Custom 'From / Reply to' Email (optional) - to receive replies at this address, your domain must be verified.
- Click Save Delivery Settings.
Things to note:
- If you entered a custom email, follow these steps here to validate and verify your domain.
- You can add a link within the body using html tags.
- If you're on a Gold subscription, you can edit the entire email's HTML.
Steps to Testing Your Email Delivery
- Select your digital release from the dropdown menu.
- Click to Send Test Email to ensure everything looks perfect.